
JINMA BRAKE LIGHT PROJECT |


by Norm S |
After spending one year cursing myself over and over for trying to drive my tractor with the parking brake on, I decided to mount a red light on the dashboard which is lit anytime the brakes are applied. This is how I did it. |
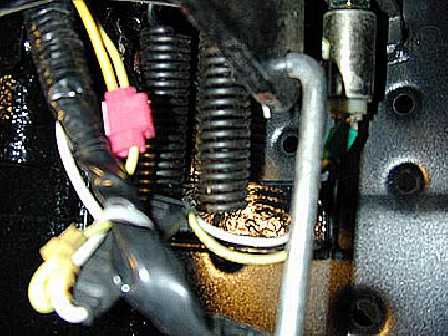
I located the brake light switch (Pictured). It is under the left floorboard near the clutch pedal bracket (The clutch and left brake share a common pivot bracket). I found the wire marked #23 (It could also be marked #24). That is the output lead from the switch that goes to the brake lights. The other wire, which is marked #22, is the "Hot" lead to the switch. (A word of caution here, don't go by the color of the wires because the factory didn't pay much attention to color. On my switch, the #23 wire out from the quick disconnect is yellow and the #22 wire is white. At the other end of the connector, the colors are reversed.) |
Once I located the #23 wire, I spliced a long piece of 16 gauge wire to it using a crimp splice (The square shaped red piece in the picture). I then threaded the long wire along side of the loom that goes up under the dashboard. Where possible, I put the wire inside the loom. Where it wasn't possible, I just ran it along side and taped it in place with black electrical tape. I also sealed the crimp fitting by wrapping it black electrical tape. |
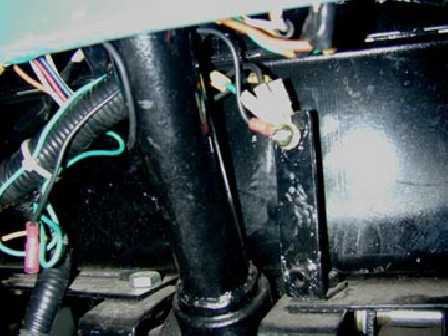
The next step was to run a ground wire for the light. Just to the right of the steering column and just below the dash is a metal bracket with three wires already attached to it with a screw. This is a ground so I attached another ground wire (the black wire with a red terminal) and ran it over to the wire that I previously brought up from the brake light switch. |
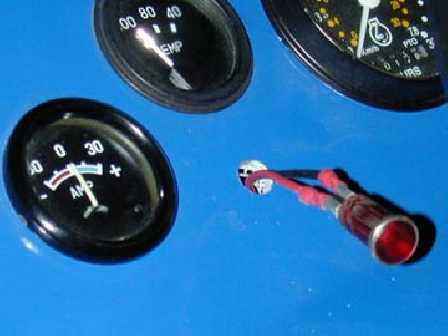
Once the wire from the switch and the ground wire were next to each other, I drilled a hole and installed the light in the dash with leads on it long enough to reach the two wires just mentioned. I made the leads long enough to allow me to move the hood around if necessary to reach the back of the instruments. I then used a quick disconnect fitting to attach the two leads from the light to the wire from the brake light switch and the ground wire. This will allow for easy removal of the hood should it be necessary. |
Here is the finished installation. When lit, the light is bright enough to catch my attention during daylight. I placed it directly under the temperature gauge because there is enough room behind the dash for the rear portion of the light and, also, because I pay close attention to the temperature gauge. This was a one afternoon and one beer (or soda) project well maybe two beers, depending on how thirsty one is!! :O) If you have any questions or comments, please email me [ranchsol@hotmail.com] NormS |